
Making simple context maps with GMT
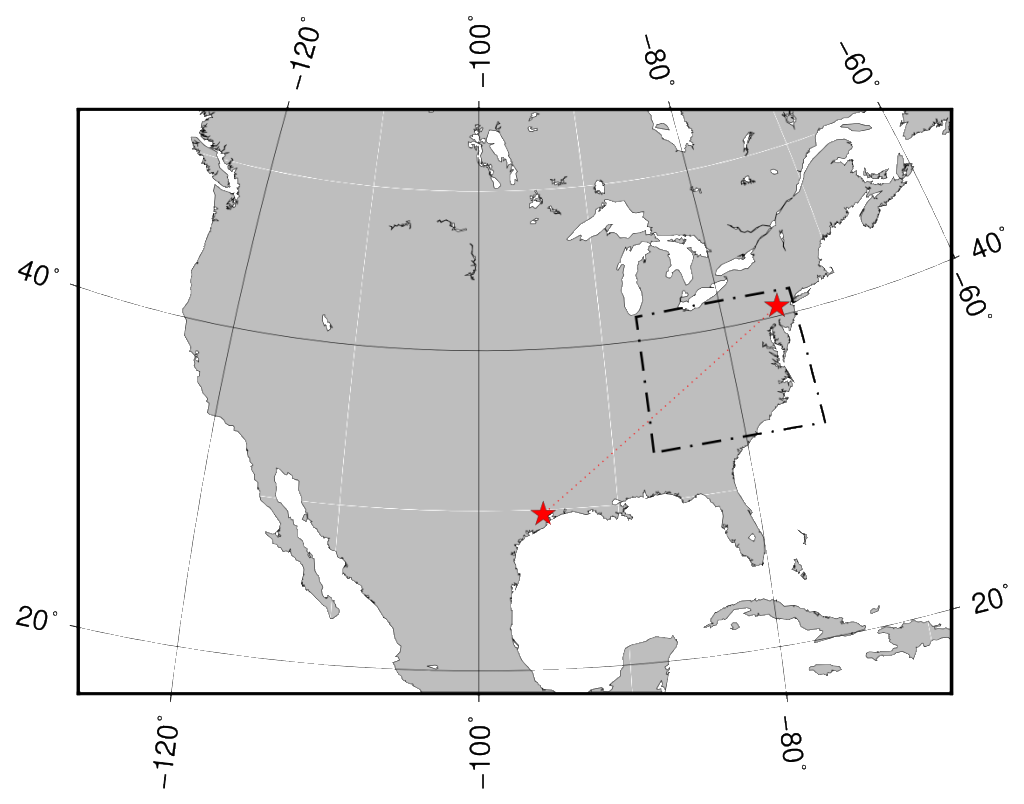
In this Generic Mapping Tools (GMT) tutorial, we will focus on two new things, 1) a different type of map projection and 2) a method to plot data on a map. The map we will make is produced below. I’m going to give some hints about how to make the specific plot, and the script used to produce it is linked below, but I recommend you try and write your own script to make it—this really is the only way to learn.
Another projection type
Let’s start with the following, basic command. It may look similar to a command we used in a previous tutorial, but something should strike you as different.
gmt pscoast -R-126/16/-54/48r -JA-100/30/5i -Xc -Yc -B20a0g20 -Dl -Ggrey -A1000/0/0 > APP_con.ps
The -R command has a different style, and there is an A argument following the -J switch we haven’t seen before. Simply put, in the previous post, we were plotting on a Mercator projection, and in this map, we are plotting on an Azimuthal projection. For an Azimuthal projection, it is necessary to specify (in addition to the range) the center of the image, around which all other objects plotted will be scaled. If you need the map to be perfect with respect to minimizing distortion, you will want to be very careful about this, but we don’t really care that much for a context map, so I just picked something close. Also, not that the -R command is specified differently; here we are specifying with a rectangle (lower-left-lon/lower-left-lat/upper-right-lon/upper-right-lat, followed by an r) for the plot area. This is required for an Azimuthal projection, because some parts of the “lines” you specify in the other format for the range may be cut off.
All the projection types with examples can be found here, and the man page description of each type is linked here.
Plot data on the map
There are many ways to plot data on a map. In this case, we want to show where two locations (Lehigh University, and Rice University) are in relation to one another. We’ll also draw a line between them, and create a box that shows the extent of a future tutorial.
Below is the part of the script required to make the two red stars on the map above.
gmt psxy -R -JA-100/30/5i -Sa0.15 -Gred -W0.1p,black << EOF >> APP_con.ps
-75.379    40.607167
-95.402778 29.716944
EOF
psxy is a GMT tool you will use extensively for plotting anything with point data, e.g. latitude-longitude pairs. You should recognize most of the switches used in this command. The new two switches are the -S and -W; the EOF will be new too.
Now, I want to make two red stars at the two locations for which I have lat-lon data. The -Sa0.15 prints a star of size 0.15 inches. -Gred simply makes it red (similarly to the gray fill we used to make the basemap). The -W switch is a common switch used to denote the pen to use to make a line—in this case it is the outline of the stars, and it is a thin (0.1pt), black pen.
The EOF is sort of a trick you can use when scripting that I find very useful. Essentially, we are using the EOF in the first line to tell the prompt to “hold on”, as we’re going to provide more information. The text from the next line, until a subsequent EOF is read into the command, and then the remainder of the first line is processed. More information here.
Explore a bit!
In all honesty, through this point, you’ve been exposed to most of the basics of building maps with GMT. You now have every tool I used to create the map above. I encourage you to try and write your own script to make the map, but if you get stuck, I’ll provide the script below.
When you build your map, think about layers and what you want to put on top. Don’t forget about using -K and -O properly. Make sure that you include necessary switches, and format arguments correctly. You’ll want to look at the some of the options for specifying pens to make the red and black, dashed/dotted lines.
All the coordinates you will need for the map are below; you’ll need to reformat them a bit to use them in the GMT commands, hint: does latitude or longitude represent an x-coordinate?
| Location | latitude | longitude |
| Lehigh University | 40.607167 | -75.379 |
| Rice University | 29.716944 | -95.402778 |
| Lower left of box | 33 | -87 |
| Lower right of box | 33 | -74 |
| Upper left of box | 41.5 | -87 |
| Upper right of box | 41.5 | -74 |
All that said, if you should get stuck and need a hint, or want to see how I did it, you can see my script and final product here.
Good luck!
Click here for the next tutorial about adding real data into your GMT script and making hillshades!